- /
- /
- /
On AZTCO-FW
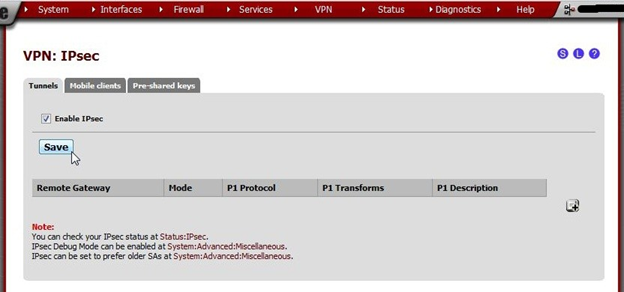
Begin by enabling IPsec.
- Navigate to VPN > IPsecCheck
- Enable IPsec
- Click Save
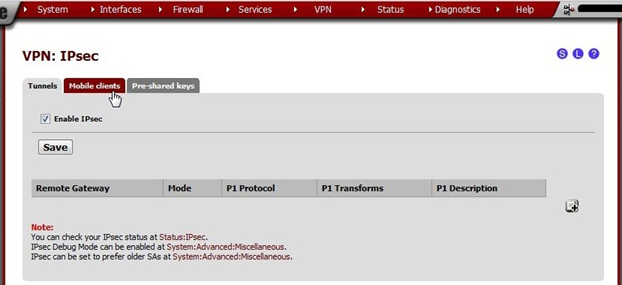
Now, create a phase 1 entry.
Do not click on this page to create a phase 1 entry. That button will not go the page needed to create a phase 1 for mobile clients but will go to a page to create a phase 1 for lan-to-lan-tunneling instead.
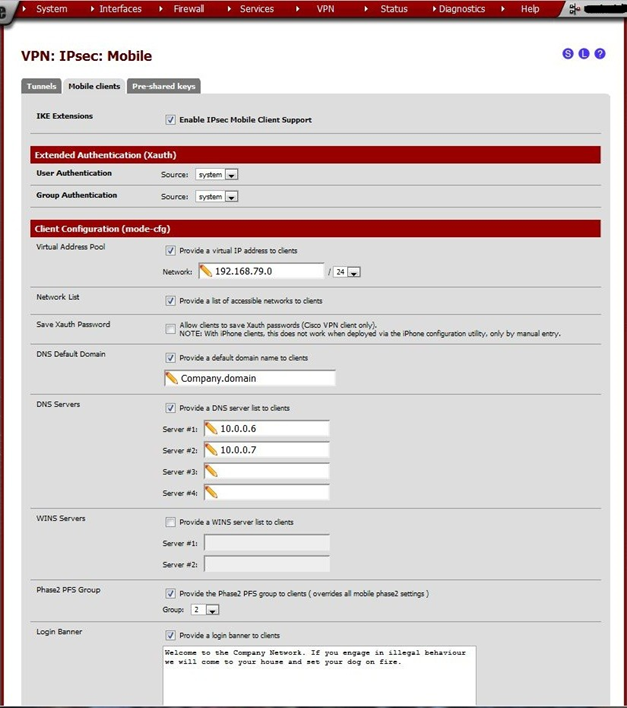
Navigate to the Mobile clients tab. Check Enable IPsec Mobile Client Support
Tell the client about available services. The more items entered here, the less clients have to enter manually. Enter the following values.
| Key | Value | Remark |
| IKE Exten- sions | checked | |
| User Au- thenti- cation | system | |
| Group Au- thenti- cation | system | |
| Virtual Ad- dress Pool | checked, network: 192.168.79.0/24 | Enter a network here that is not in use in the LAN and preferably not in any clients’ LAN either. It can be any subnet, but don’t pick a commonly used one (e.g. don’t use 192.168.0.0/24 or 192.168.1.0/24). It will confuse the clients. |
| Net- work List | checked | |
| Save Xauth Pass- word | unchecked | Check if using xauth and the clients should be able to save passwords locally. |
| DNS De- fault Do- main | Check to supply a de- fault DNS domain for hostname resolution by clients | Optional but if a domain is present (such as Active Directory) clients will be able to resolve servers faster. |
| DNS Servers | Check if clients must get DNS over IPsec | If Active Directory is used, enter its DNS servers here. If it’s a home network, the IP address of the firewall, Google public DNS, OpenDNS, or any other DNS server reachable via the VPN may be used. |
| WINS Servers | Check if WINS is in use | Superfluous if also providing DNS but may be needed for some older domain configurations. |
| Phase2 PFS Group | checked, group 2 | Not necessary to set here, as it may be set in the Phase 2 of the mobile IPsec tunnel settings |
| Login Banner | Optional | Client software which honors the login banner will present this text to the user upon login. May be needed to display some legal information or any other welcome message. |
When finished, click Save, then click Apply Changes.
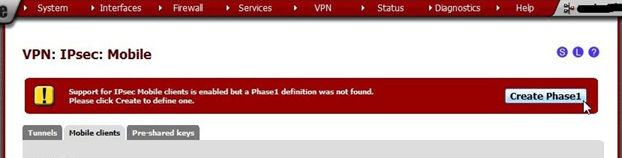
After saving, a warning will appear Support for IPsec Mobile clients is enabled but a Phase1 definition was not found. Please click Create to define one.
Click the Create Phase1 button.
Clicking the button will load the appropriate page to create a Phase 1 for mobile clients. On the VPN: IPsec: Edit Phase 1: Mobile Client page, enter the following values:
| Key | Value | Remark |
| Disabled | not checked | |
| Interface | WAN | |
| Description | Mobile Clients | This can be anything, name it something appropriate. |
| Authentication method | Mutual PSK | |
| Negotiation mode | aggressive | |
| My identifier | My IP address | |
| Policy Generation | Unique | Might prevent traffic to the LAN if set to something else. |
| Proposal Checking | Strict | |
| Encryption algorithm | AES, 256 bits | Choose any, but keep it identical on router and client. |
| Hash algorithm | SHA1 | |
| DH key group | 2 | |
| Lifetime | 3600 | |
| NAT Traversal | Force | Might prevent traffic to the LAN if set to something else. |
| Dead Peer Detection | not checked |
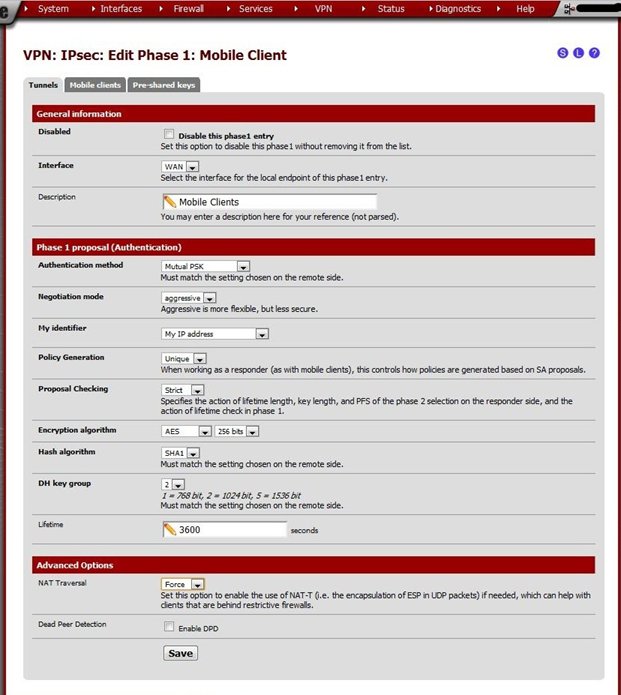
Click Save.
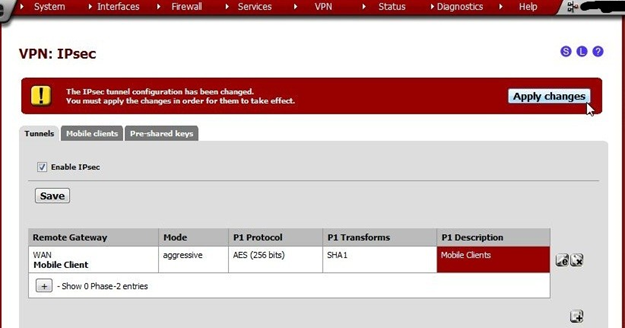
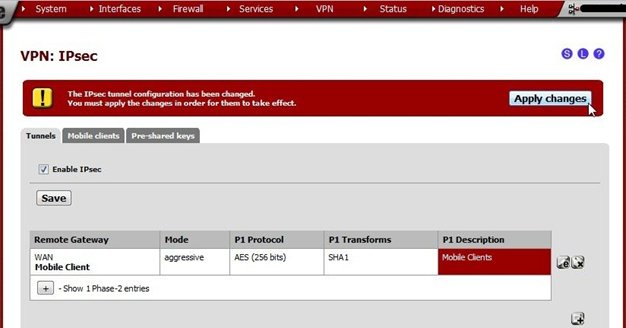
A warning will appear: The IPsec tunnel configuration has been changed. Apply the changes for them to take effect.
Click Apply changes.
The notice for The changes have been applied successfully. may be ignored. The neurotics among us may click the
Close button but that’s optional.
With phase 1 created, we can create a phase 2.
Click to list the Phase 2 entries under the newly created Phase 1.
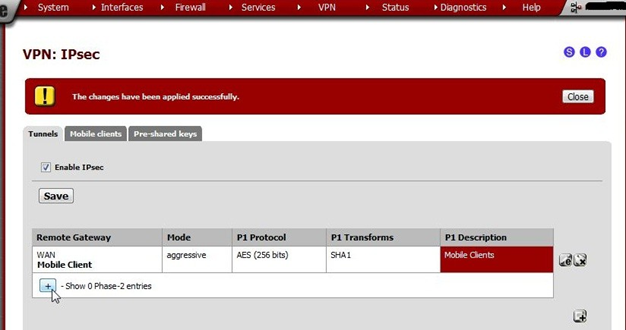
Surprise! There aren’t any. Create one by clicking + in the Phase 2 list.

This will open the VPN: IPsec: Edit Phase 2: Mobile Client page.
On the VPN: IPsec: Edit Phase 2: Mobile Client page, enter these values:
On the VPN: IPsec: Edit Phase 2: Mobile Client page, enter these values:
| Key | Value | Remark | |
| Disabled | not checked | ||
| Mode | Tunnel | ||
| Local work | Net- | LAN subnet | |
| Description | Phase 2 for road warriors | Enter something appropriate. | |
| Protocol | ESP | ||
| Encryption algorithms | select 3DES | only | The best is chosen at handshake time. Others will probably work too. 3DES works for me because I have a mobile application that will work only with this. |
| Hash rithms | algo- | Select SHA1 and MD5 | |
| PFS group | key | Set to Group 2 | |
| Lifetime | 3600 | ||
| Automati- cally ping host | leave empty |
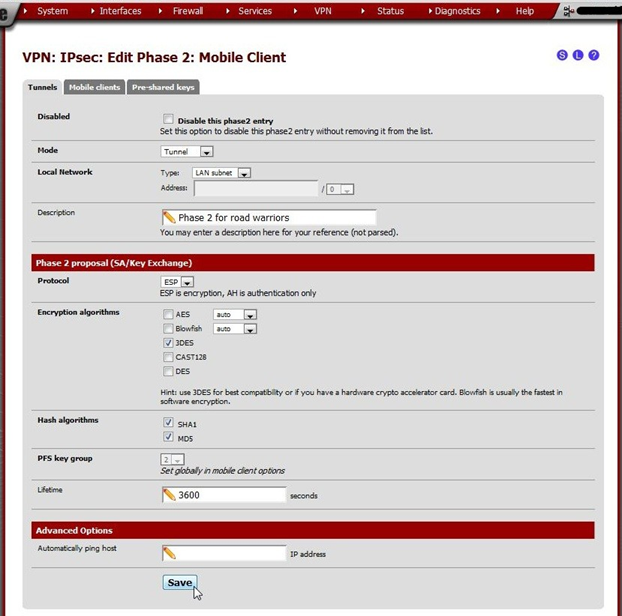
Click Save, then click Apply changes.
We’re almost done here. We need to create user accounts so someone can actually use the tunnel.
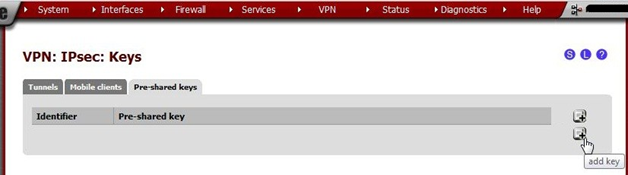
Navigate to VPN > IPsec, Pre-shared keys tab. (Screenshots may look a bit different because in-use keys have been redacted.)
There are different ways to set up pre-shared keys for users.
Click + to create a new Pre-Shared Key.
For identifiers, e-mail addresses are commonly used as they are more unique than first or last names. Any identifier may be used so long as it is unique to the person using the account. We recommend using e-mail address format identifiers. They don’t really need to exist, they are only used for IPsec identification.
Generate a long/random Pre-Shared Key. There are many utilities to generate random data, such as Lastpass, KeyPass, or online sites such as https://www.grc.com/passwords.htm. (Use the string in the middle: 63 random printable ASCII characters). Offline tools are preferred.
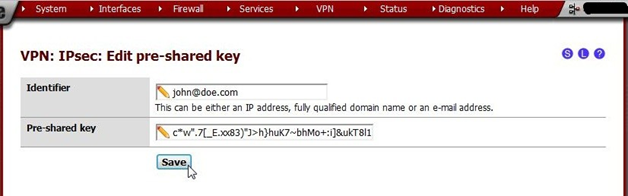
Press Save, wait for the page to load, note that the key is now in the list and press Apply changes.
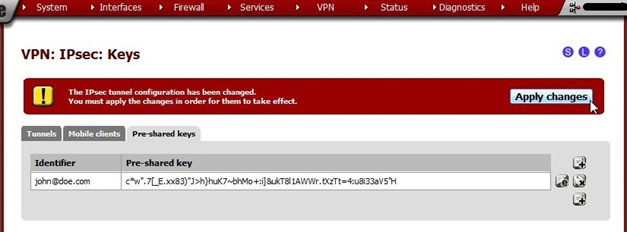
Congratulations, the firewall configuration is complete