- /
- /
- /
Set up the IPsec tunnel Phase 2
Site A Configuration
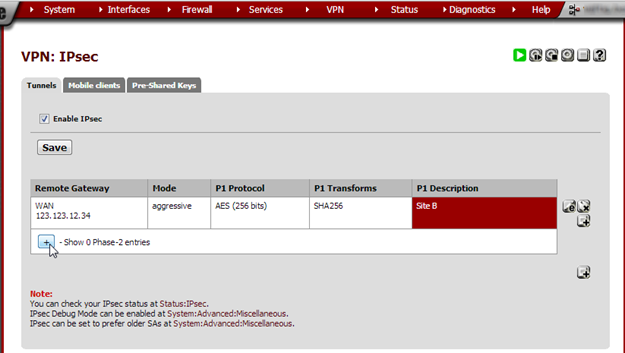
Click + under the Phase 1 entry. It will show an overview of all available Phase 2 entries. Since we haven’t made any yet none are shown.
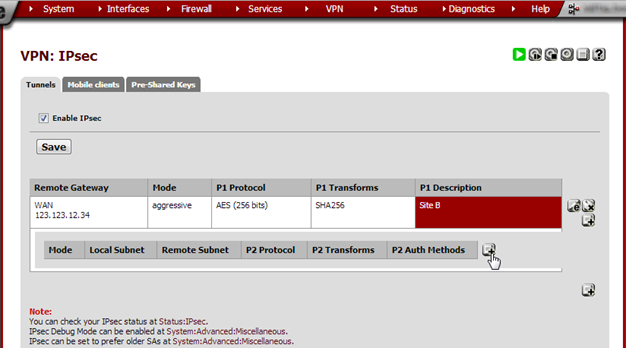
Click + to create a new Phase 2.
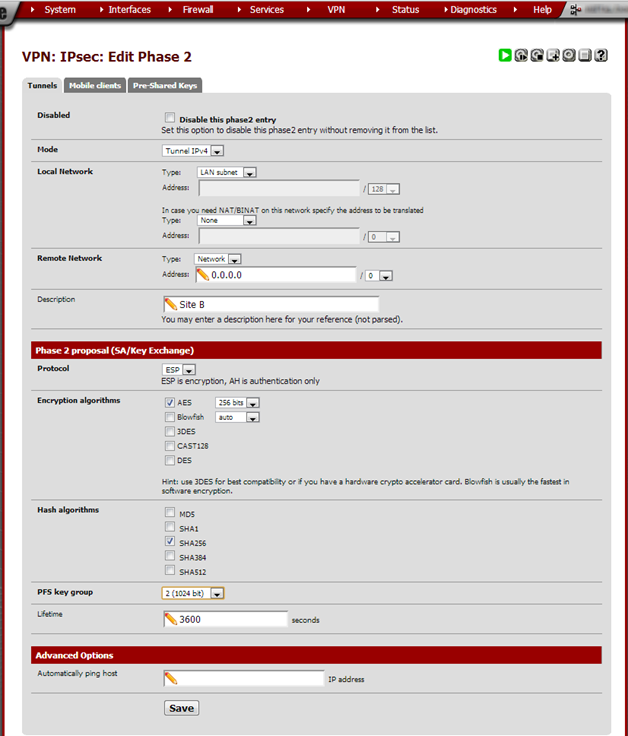
Enter these values:
| Field | Value | Notes |
| Mode | Tunnel IPv4 | |
| Local Network | Type: LAN subnet. NAT/BINAT type: None. | |
| Remote Network | 0.0.0.0/0 | This tells AZTCO-FW to route everything over this interface. |
| Description | Site B | |
| Protocol | ESP | |
| Encryption algo- rithm | AES 256 bits | |
| Hash algorithm | SHA256 | |
| PFS key group | 2 (1024 bit) | |
| Lifetime | 3600 | |
| Automatically ping host | Enter a hostname or IP address to keep the tunnel alive. | In my experience this is not necessary. |
Click Save and on the next page click Apply Changes.
Site B Configuration
Remote Network, Type: Network Local Network, Address: 0.0.0.0/0 Remote Network, Address: Site A’s LAN subnet Use the same Phase 2 proposal and Advanced options as in Site A.
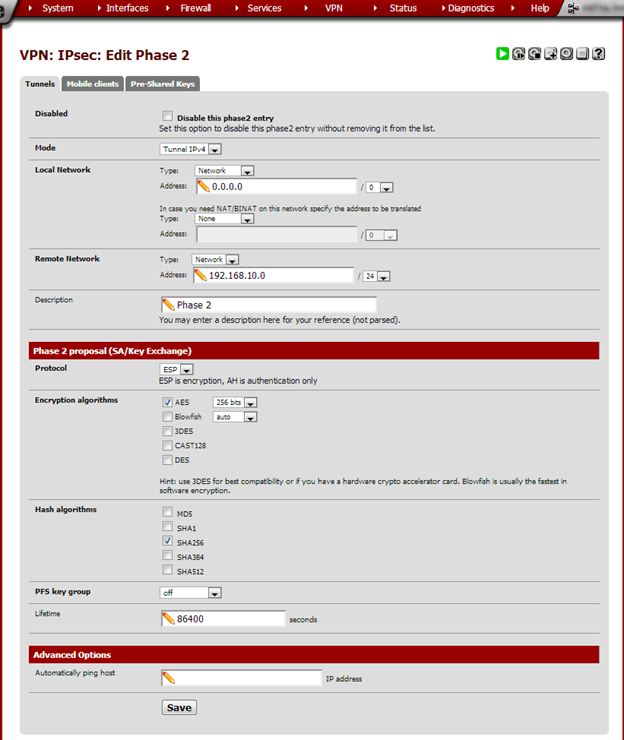
Click Save and then Apply Changes.