- /
- /
- /
Configuring IPsec IKEv2 Remote Access VPN Clients on Ubuntu
Before starting, install network-manager-strongswan and strongswan-plugin-eap-mschapv2 using apt-get or a similar mechanism.
Setup the VPN Connection
- Copy the CA Certificate for the VPN from the firewall to the workstation
- Click the Network Manager icon in the notification tray by the clock (Icon varies depending on the type of network in use)
- Click Network Connections
- Click Add
- Select IPsec/IKEv2 (strongswan) under VPN as shown in Adding an IKEv2 VPN on Ubuntu
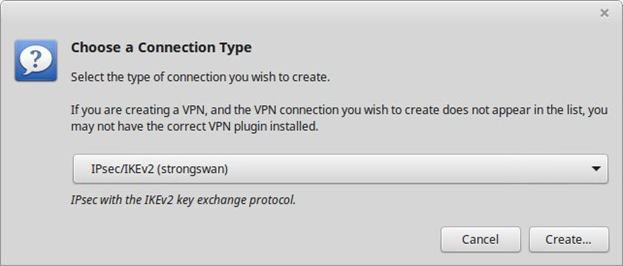
Note: If the option is not present, double check that network-manager-strongswan is installed.
- Click Create
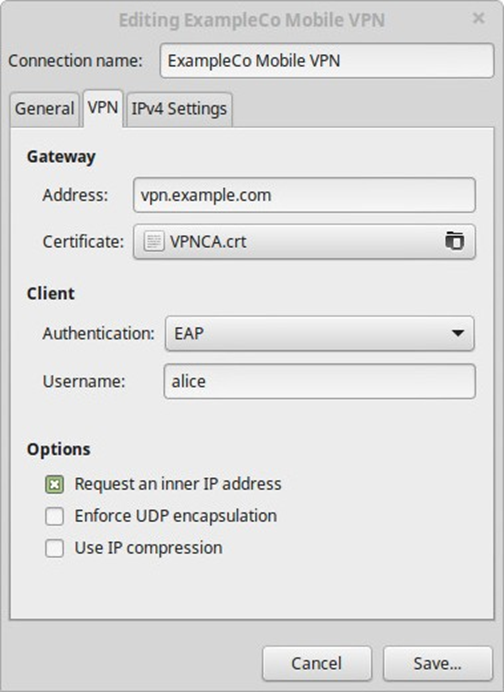
- Enter a Description (e.g. ExampleCo Mobile VPN)
- Select the VPN Tab
- Enter the Address of the firewall (e.g. vpn.example.com)
- Select the control next to Certificate and browse to find the downloaded CA Certificate
- Select EAP for Authentication
- Enter the Username to be used for this connection (e.g. alice)
• Check Request an inner IP address
- Compare the settings to those shown in figure Ubuntu VPN Client Settings
- Click Save
- Click Close
Connecting and Disconnecting
To Connect:
- Click the Network Manager icon
- Click the VPN Name or click VPN Connections to move the slider to the On (1) position
Note: If a password prompt does not appear, the network manager service may need restarted or a reboot of the workstation may be necessary.
To Disconnect:
- Click the Network Manager icon
- Click VPN Connections to move the slider to the Off (0) position