- /
- /
- /
Create and Assign the GIF Interface
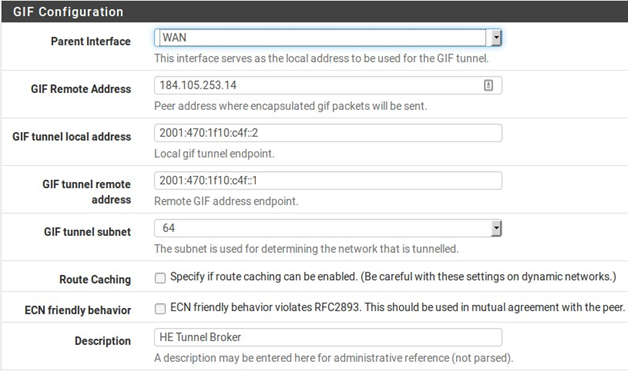
Next, create the interface for the GIF tunnel in AZTCO-FW. Complete the fields with the corresponding information from the tunnel broker configuration summary.
- Navigate to Interfaces > Assignments on the GIF tab.
- Click
Add to add a new entry.
- Set the Parent Interface to the WAN where the tunnel terminates. This would be the WAN which has the Client IPv4 Address on the tunnel broker.
- Set the GIF Remote Address in AZTCO-FW to the Server IPv4 Address on the summary.
- Set the GIF Tunnel Local Address in AZTCO-FW to the Client IPv6 Address on the summary.
- Set the GIF Tunnel Remote Address in AZTCO-FW to the Server IPv6 Address on the summary, along the with prefix length (typically / 64).
- Leave remaining options blank or unchecked.
- Enter a Description.
- Click Save.
See Figure 61: Example GIF Tunnel.
If this tunnel is being configured on a WAN with a dynamic IP, see Updating the Tunnel Endpoint for information on how to keep the tunnel’s endpoint IP updated with HE.net.
Once the GIF tunnel has been created, it must be assigned:
- Navigate to Interfaces > Assignments, Interface Assignments tab.
- Select the newly created GIF under Available Network Ports.
- Click
Add to add it as a new interface.